Since the release of iOS 4.2, you can print* from an iPad, iPhone or iPod touch to any AirPrint enabled printer. But what if you don’t have an AirPrint enabled printer? What if you’re using a 15 year old HP LaserJet that wouldn’t know an iPad from an iHop?
AirPrint for the rest of us…
There are a variety of solutions that turn any printer into an AirPrint accessible device. I’m using one called AirPrint Activator**, version 3.1.0., a DonationWare application from Netputing.
AirPrint Activator is a software application that runs on a Mac or Windows PC and turns your computer into an AirPrint print spooler. (I’m using the Mac version.) It installs in System Preferences.

After installation, share your printer from the computer. AirPrint Activator fools an AirPrint device into thinking it’s printing to an AirPrint enabled printer.
Let’s begin:
1. Download AirPrint Activator: http://netputing.com/airprintactivator/airprint-activator-v3-0/
2. Install AirPrint Activator.
3. Share one or more of your printers via the computer on which you installed AirPrint Activator. (The computer and printer must be on the same wireless/wired network.)
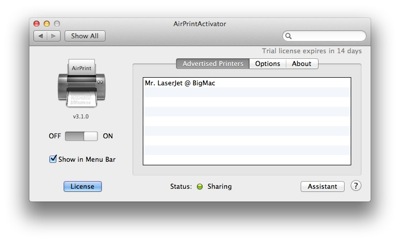
4. Turn on AirPrint Activator. Go into System Preferences, select AirPrint Activator and set the sliding switch to On. The printer(s) you shared will show up in the list on the right.

In my case, the printer name is Mr. Laserjet.
Next, on your iPhone, iPad or iPod touch, bring up an application that supports printing. Depending on the application you’re using, you’ll tap one of the following symbols to bring up the printing option:
![]()
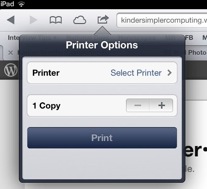
I’m using iOS 6 and Safari for this example. Follow the next four screens to select the printer you shared, then hit the Print button.

Tap on the Print icon.

Tap on Select Printer >.

Tap on the printer you wish to print to.

Tap on Print. That’s it!
* iPad (All models), iPhone (3GS or later), iPod touch (3rd generation or later)
**Netputing is renaming AirPrint Activator to handyPrint™ when it release version 3.1.1. Only the name is changing. If you installed a previous version, upgrading to version 3.1.1 will change the name of the application and update the icon. No need to uninstall anything.

